SCOPCOMM Admin Guide
Last updated for version 1.12, updated February 17, 2021
Introduction
SCOPCOMM is a softphone and WebRTC solution offered by SCOPSERV International. This guide explains how to enable SCOPCOMM on SCOPTEL and issue provisioning data for user devices. Unless otherwise specified, they are available at https://download.scopserv.com/software/.
SCOPTEL offers the following SCOPCOMM clients:
SCOPCOMM for iPhone, available on iOS App Store
SCOPCOMM for Android, available on Android Google Play
SCOPCOMM Desktop for Windows
SCOPCOMM Desktop for MacOS
SCOPTEL also offers the following WebRTC solutions:
SCOPCOMM WebRTC available at https://rtc.scopserv.com
SCOPCOMM WebRTC Windows
SCOPCOMM WebRTC MacOS
Licences
To use SCOPCOMM, you must have purchased SCOPCOMM licences. You will need a licence for each device using SCOPCOMM as softphone or WebRTC, and specify how many of each type you want. In SCOPTEL you can view your number of allowed SCOPCOM under Configuration > Server > License. After updating your licence with you provider, do not forget to update the licence on SCOPTEL by clicking the Download button.
Requirements
Warning
SCOPCOMM is an internet service. It requires that your SCOPTEL server be reachable at a public IP address.
You must have SCOPTEL installed and running with a valid licence. It is also important that in the case you have a firewall between your server and Internet access, it must not block traffic to and from certain addresses (ask your provider). Otherwise, it will not be possible to support provisioning and basic SCOPCOMM services.
If you set up Security (ACL) rules in SCOPTEL, make sure you allow the following IP addresses, otherwise WebRTC users will not be able to connect to your PBX:
75.98.128.37
75.98.128.38
Your installation’s firewall must allow the following ports:
5060 (UDP)
5060 (TCP), or 5061 (TLS) if you need high-level encryption
10000 to 20000 (UDP)
Warning
Throughout this guide we use these values since they are the default values in SCOPTEL, but if they have been set to different values, you must substitute the new port number in every place where a port must be specified.
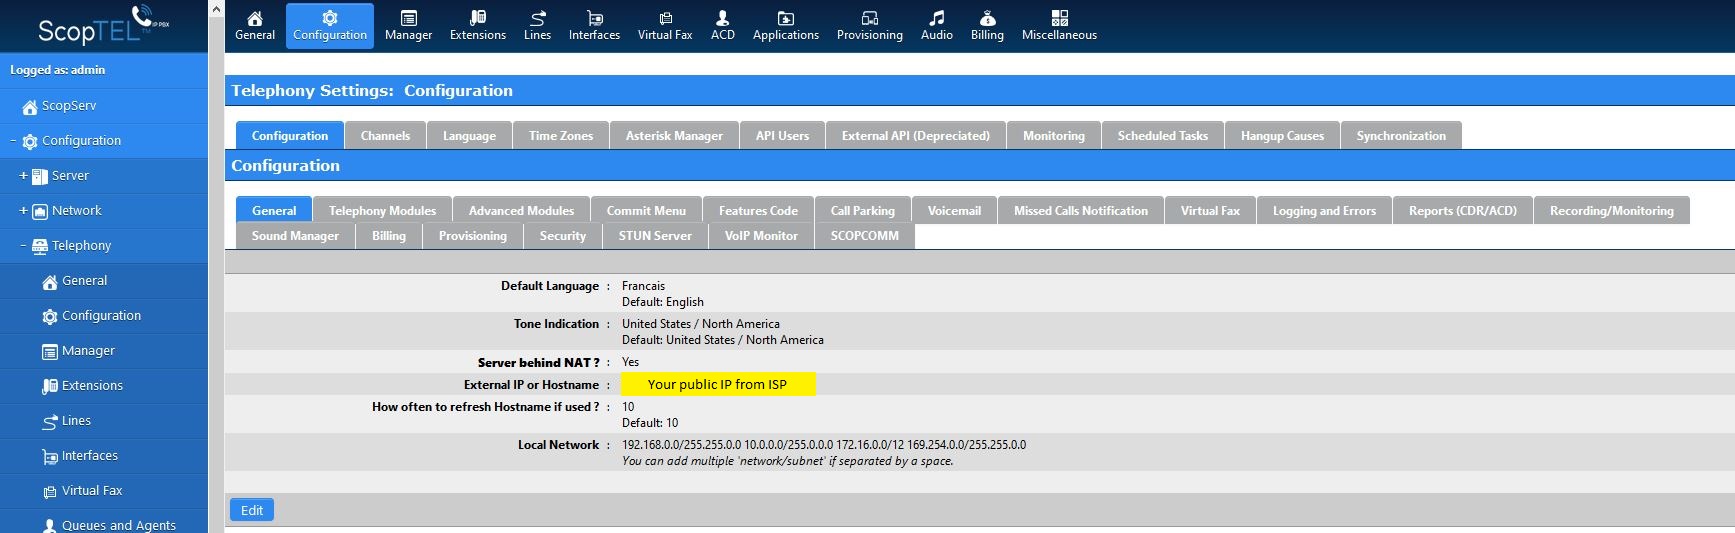
Additionally, if your server is in a NAT (network address translation) network, you must configure the server address:
In SCOPTEL, go to Configuration > Telephony > Configuration > General.
Make sure that the Server behind NAT is active.
Write the public IP adresse just below.
Press the Commit button.
Please note that the public IP address must be static. If this is not the case, contact your Internet service provider to obtain one. For more information on SCOPTEL and NAT, please read https://blog.scopserv.com/2016/09/how-to-use-the-scoptel-certificate-manager-to-enable-tls-encryption/.
You can use the yougetsignal public utility (https://www.yougetsignal.com/tools/open-ports/) to check that your system is really reachable from Internet. You should test your server address with ports 5060 and 10000 to quickly check that your firewall rules are correct.
Security and Encryption
For security purposes, we encourage you to use SSL certificates on your SCOPTEL installation. To set this up, please refer to this document: https://blog.scopserv.com/2016/09/how-to-use-the-scoptel-certificate-manager-to-enable-tls-encryption/.
SCOPTEL Configuration
SCOPTEL must be configured to allow SIP on TCP:
In SCOPTEL, go to Configuration > Telephony > Configuration > Channels > SIP Channel.
Make sure that the Enable Support for SIP TCP option is active and in the TCP Port write 5060 (or your TCP or TLS port setting).
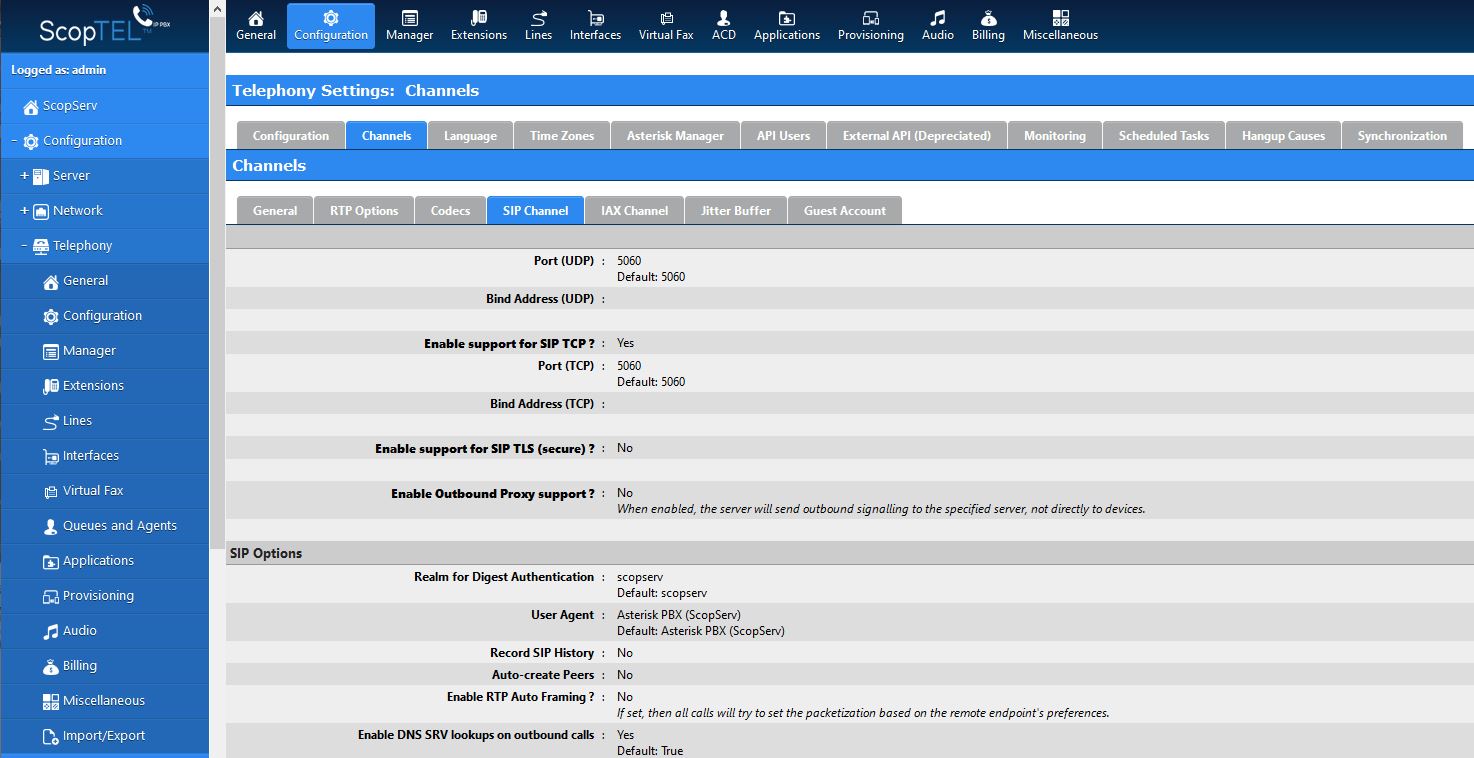
Click Commit.
Got to Configuration > Network > Firewall > Advanced Rules.
Find and edit entry VoIP (SIP/IAX/MGCP) and add this rule: 5060/tcp (substitute your TCP or TLS port setting).
Click Commit.
Go to Configuration > Network.
Click Restart Service.
SCOPCOMM Configuration
You must configure a SCOPCOMM admin e-mail and select the notification destination. This e-mail will be used to issue provisioning information necessary.
If the public address/domain or ports of your network are not the same as that of your installation, this is where you must specify them. For example, if you use a firewall or SBC that has different values, this is where you must specify it. This address and port are the ones visible to devices on the public network.
In SCOPTEL, go to Configuration > Telephony > Configuration > SCOPCOMM.
Click Edit.
Write the public IP address or domain of your installation.
Set an administrator e-mail.
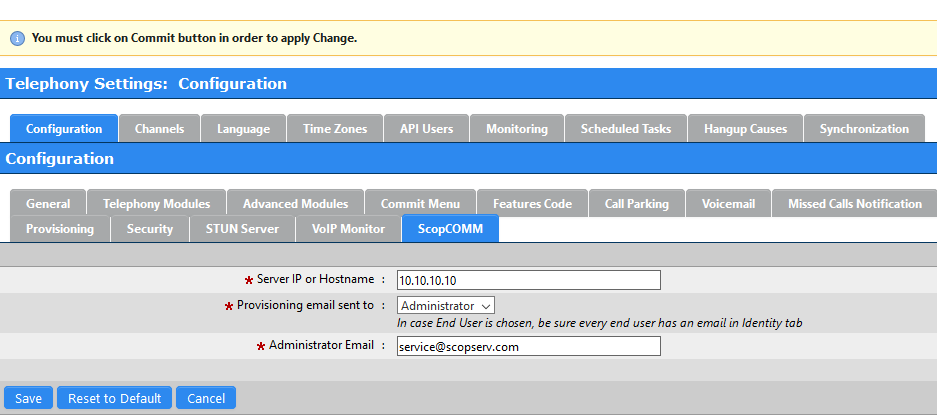
Select a destination for provisioning e-mails. The options are:
Administrator: the admin e-mail configured on this page is the only recipient of provisioning info.
End user: end users will get the provisioning e-mail at the address configured under their profile.
Both
If your public ports are not the same as your installation’s ports, first click “Specify custom public ports” and type in the ports for each protocol (UDP, TCP, TLS).
Click Save.
Provisioning
To generate provisioning information for devices using SCOPCOMM:
In SCOPTEL, go under Configuration > Telephony > Extensions.
If you want to add a SCOPCOMM account to an existing extension, click click the edit button next to the extension of your choice and go to step 4.
To create a new extension with SCOPCOMM, click Add a new phone. Under the General tab, select the tenant (if you are in a multi-tenant site.
Under the General tab, select phone type SIP and click Add/Save.
Under the Authentication tab, type a username and password.
If you want to enable SCOPCOMM for multiple devices or for a device other than the main one, check Enable Shared SIP support ?. This will automatically add another SIP device. You can have up to three devices per extension.
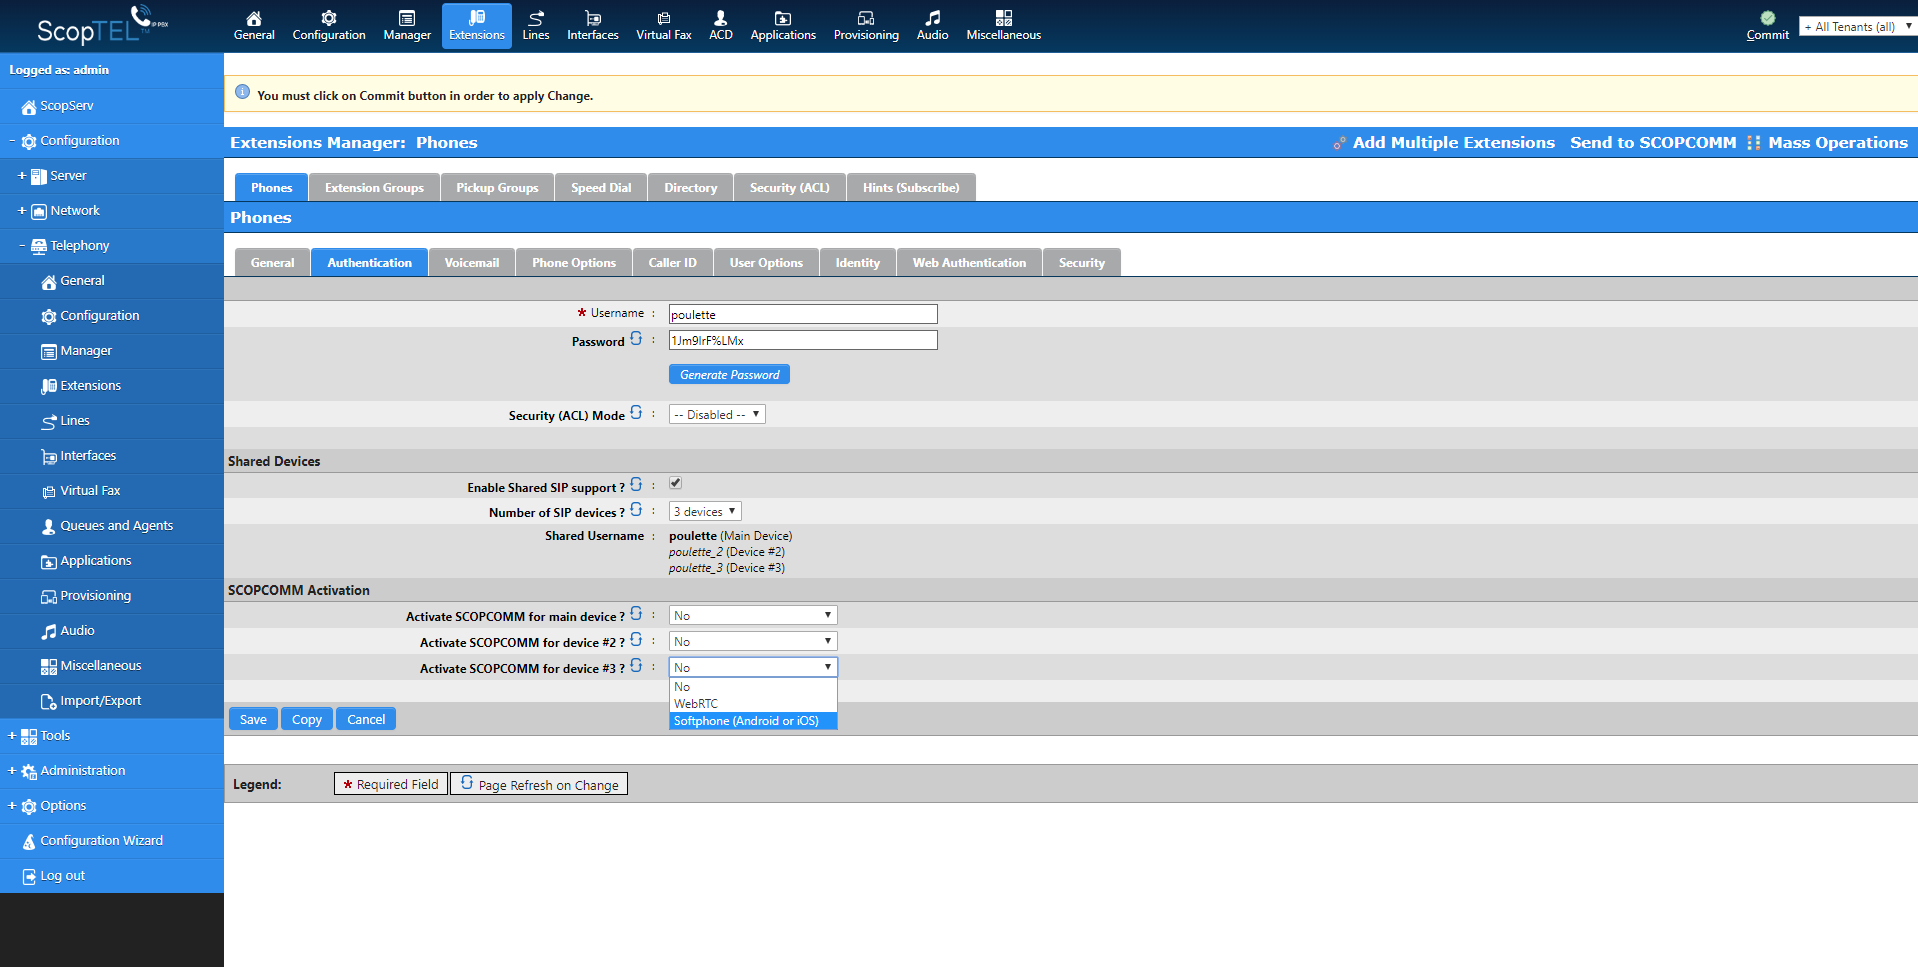
For each device select if you want activate SCOPCOMM for softphone, desktop, or WebRTC. You may also choose to not activate SCOPCOMM for that device. Just below is indicated the number of each type you have left.
Under the Phone Options tab, set the following:
Transport Mode: UDP and TCP (or TLS is you have SSL security set up on your system)
Phone behind NAT: selected if you are in a NAT network
Codec: H.264 Video
Under the Identity tab, write the user e-mail. This is where the provisioning e-mails will be sent to.
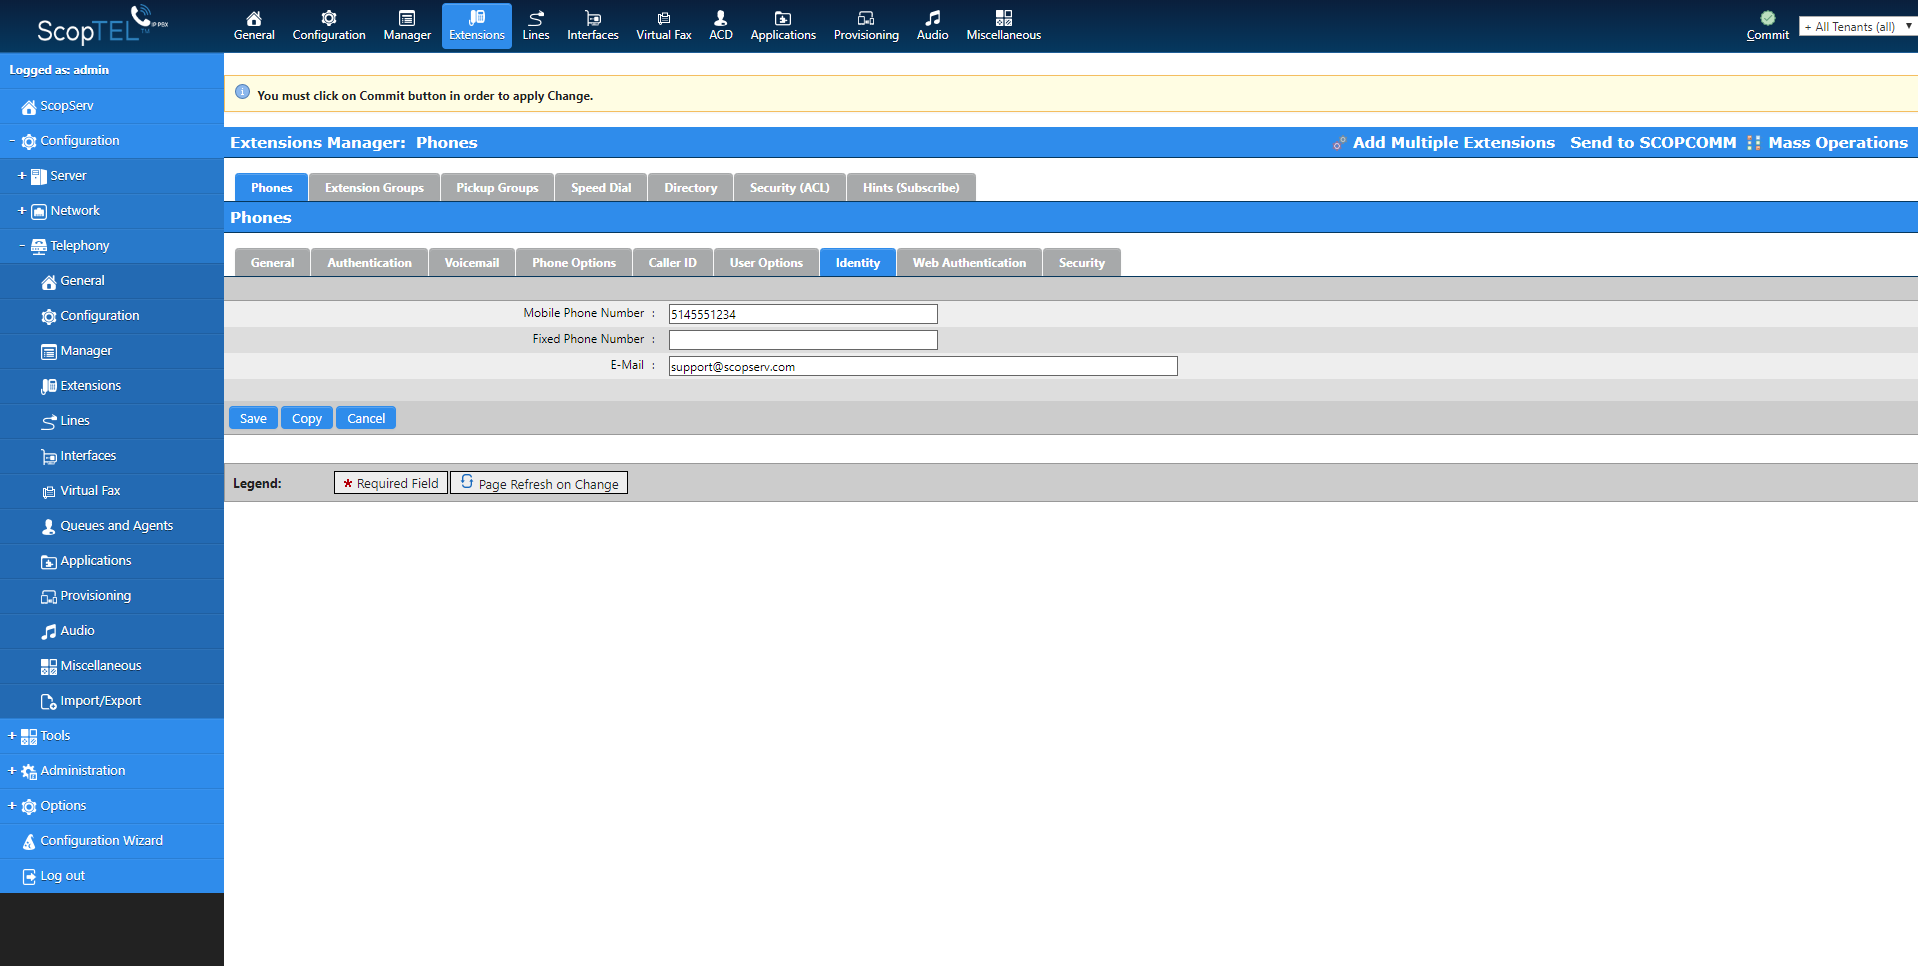
Click Save.
Click Send to SCOPCOMM. A pop-up will display success or errors.
If any username, password, or number of shared device has changed, you will also need to click Commit to save changes on SCOPTEL.
Following this, provisioning e-mails will be sent as per your configurations: each user will receive a provisioning e-mail with their credentials, or the admin may receive these e-mails. E-mails are resent following any update in SCOPTEL, assuming you clicked Send to SCOPCOMM.
Be advised that each device will require a licence, so if user has three shared devices and uses SCOPCOMM on two of them, two licences will be used.
Forcing a Provisioning Update
If a user failed to get their provisioning information, or if for some other reason you need to resend a user’s provisioning information:
In SCOPTEL, go under Configuration > Telephony > Extensions.
Click the edit button for the extension.
Under the Authentication tab, click Resend.