SCOPTEL CentOS 7.X Boot Disk Installation Guide
Introduction
CentOS Linux
The CentOS Linux distribution is a stable, predictable, manageable and reproducible platform derived from the sources of Red Hat Enterprise Linux (RHEL).
Warning
Whether you are installing a new system, or updating an older installation, it is crucial that you check hardware compatibility with CentOS7. Many older hardware cannot support CentOS7. Please check official Red Hat documentation at https://access.redhat.com/ecosystem/search/#/category/Server?sort=sortTitle%20asc&certifications=Red%20Hat%20Enterprise%20Linux%207&architectures=x86_64&ecosystem=Red%20Hat%20Enterprise%20Linux.
ScopTEL
The ScopTEL applications suite is a complete IP PBX management system used to manage the Asterisk open-source toolkit. ScopTEL’s intuitive and comprehensive graphical interface takes full advantage of all the proven features of this platform. Recognized globally by VoIP professionals ScopTEL brings the benefits of Asterisk and other evolving open standards while controlling costs. In addition to offering unparalleled ease of use ScopTEL extends Asterisk’s functionalities to offer a complete unified communications system.
Previous versions of ScopTEL were either based on CentOS versions 4, 5, or 6.
However these versions have limited lifecycle support and it was necessary for ScopServ International to Release an ScopTEL packages based on CentOS version 7.X.

As of 2020-02-01 the current version of ScopTEL install is CentOS Linux release 7.7 64 bit (x86_64)
Hardware Recommendations
Quad Core 64 bit CPU x86_64 architecture
4 GB RAM
60 GB Hard Drive or Virtual Machine Container
Where to Download the Installation ISO
Installation Options:
Burn to DVD and boot to DVD drive on a standalone server
Copy ISO to USB key using Rufus and boot to USB on a standalone server
Download Rufus from https://github.com/pbatard/rufus/releases/download/v3.8/rufus-3.8.exe
Install the ISO using a Virtual Machine Container
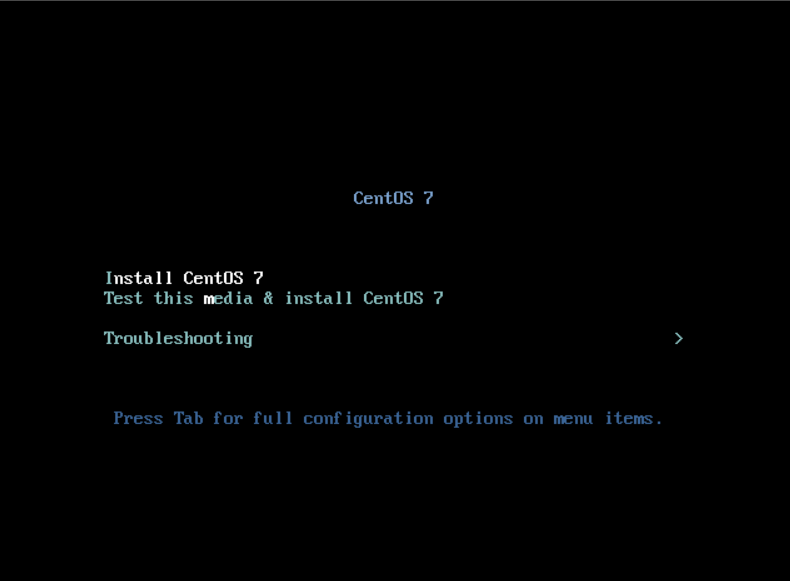
Boot Media Installation Option 1. DVD
Once you have downloaded the ISO file from the CentOS website use your favourite software to burn the image to a bootable DVD
Attach a DVD drive to the target server
Edit the server’s BIOS to boot from DVD first
Boot Media Installation Option 2. USB
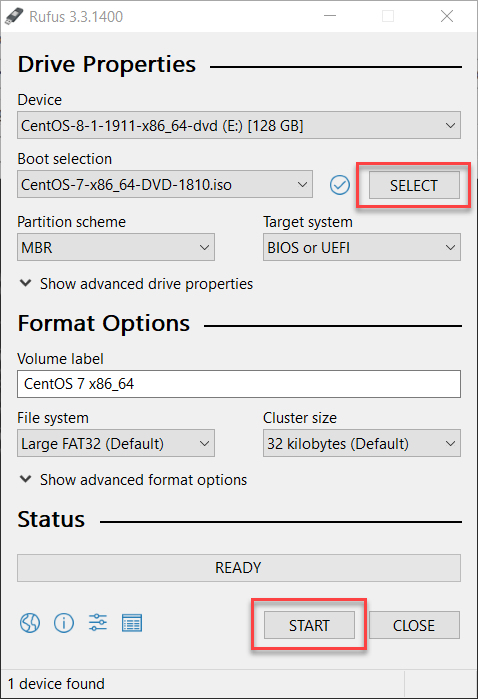
Once you have downloaded the ISO file from the CentOS website use Rufus to make a bootable USB drive
Use the SELECT button to choose the directory where you downloaded CentOS 7
Click on START to write the bootable ISO to the USB drive
Remove the USB drive
Insert the USB drive into the target server
Edit the server’s BIOS to boot from USB first
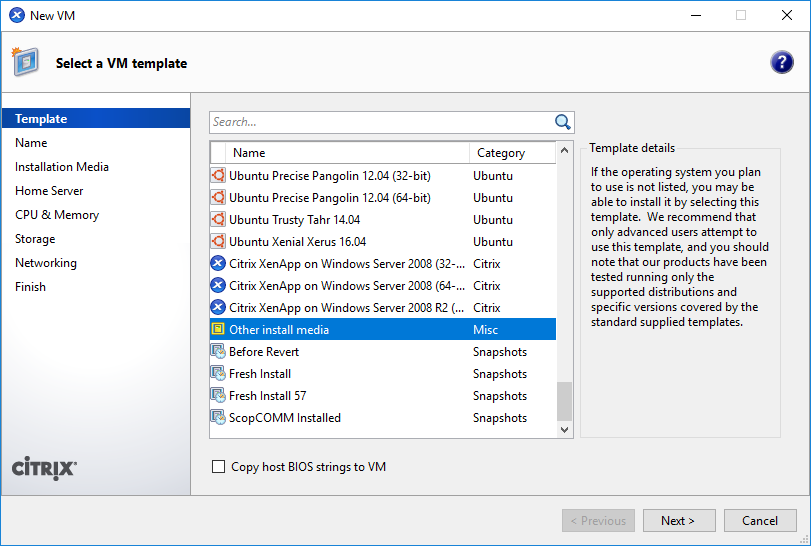
Boot Media Installation Option 3. Virtual Machine
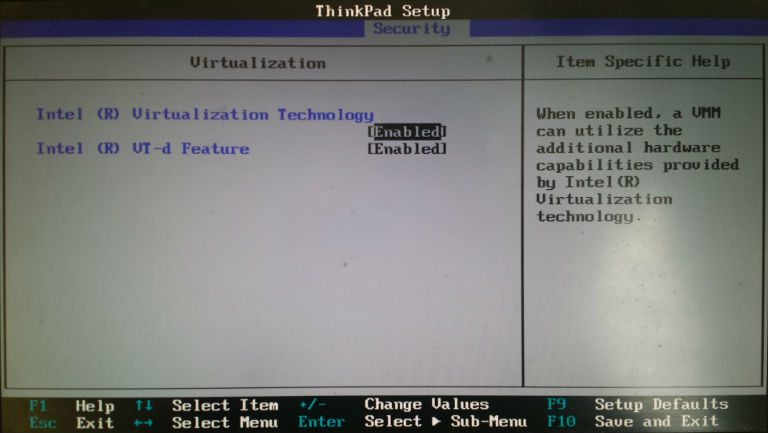
Once you have downloaded the ISO file from the CentOS website edit the target server’s BIOS and ensure that Virtualization Options are enabled
If you are not using Microsoft Hyper-V on the host you may have to disable Hyper-V in Windows Features
Check with your VM Vendor for documentation and support
ScopTEL is known to work with Xen, VMWare, Hyper-V, VirtualBox

BEFORE YOU BEGIN!
Installing from the CentOS 7 installation media will format and destroy all data on your existing drives!
If you are upgrading a previous ScopTEL distribution you will need to ensure all data is backed up before proceeding. Refer to the documentation available at https://blog.scopserv.com/2012/06/how-to-backup-and-restore-a-scoptel-pbx/ The Putty and WinSCP method is the recommended method.
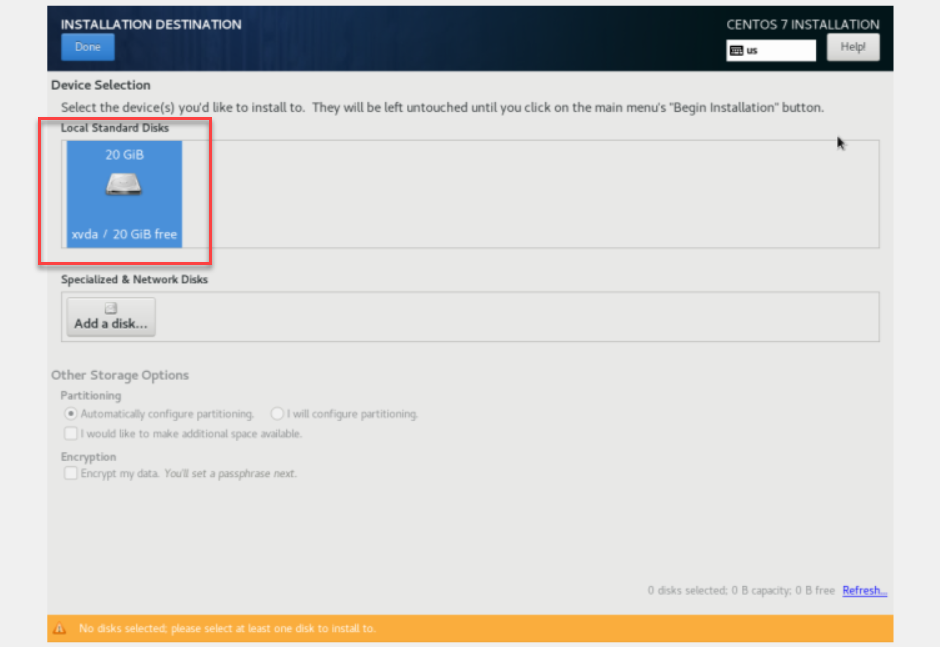
INSTALLATION DESTINATION
Click on the INSTALLATION DESTINATION to customize and select the installation drive and partition
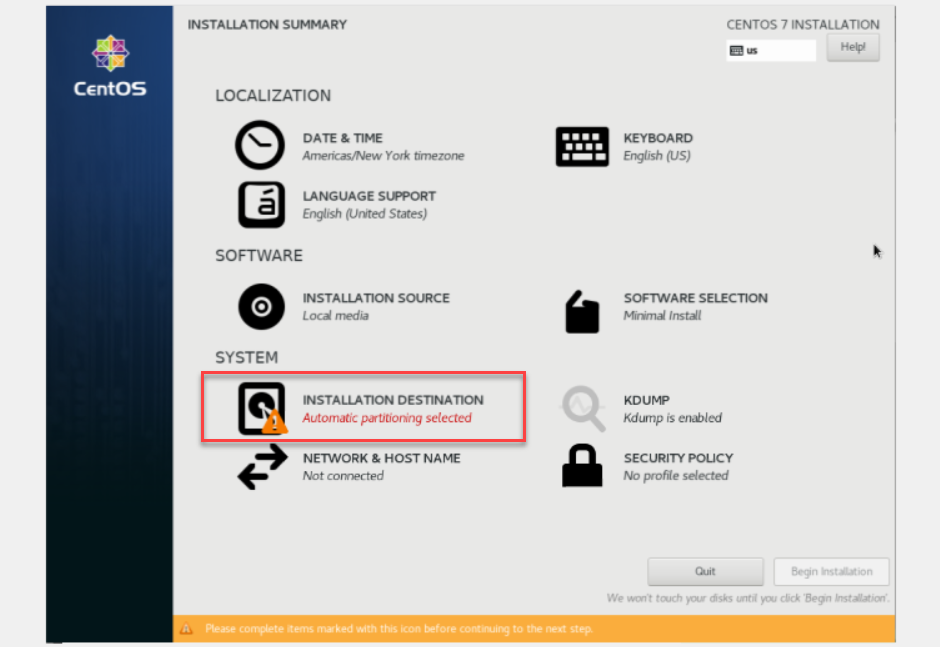
Click on the INSTALLATION DESTINATION if you would like to customize your Partition
Click on Done when your are finished selecting your Destination
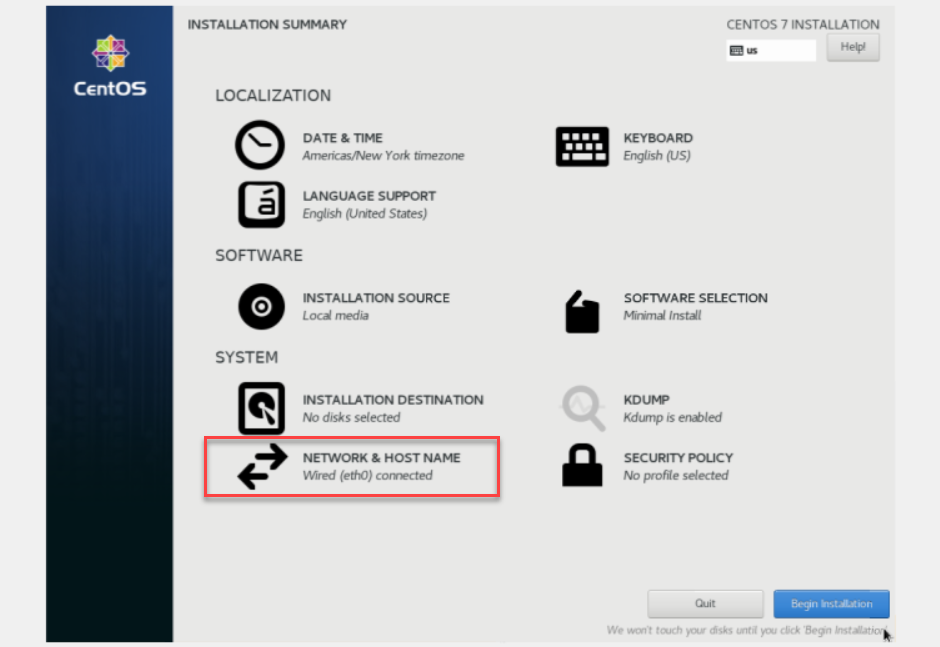
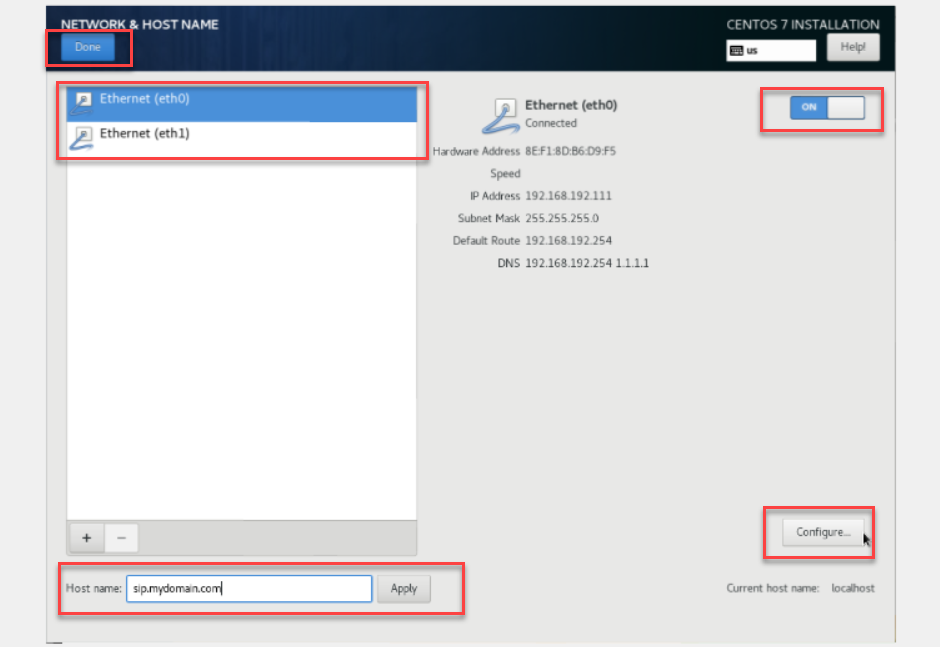
NETWORK & HOST NAME
Click on the Click on the NETWORK & HOST NAME
NOTE: All Ethernet devices are DISABLED by DEFAULT so you must manually ENABLE them using the mouse to change the OFF setting to ON
Change the Default Host name to match your network requirements
Use the Configure button if you need to change the Network parameters to something other than the Default DHCP configuration.
Click the Done button once you are sure your configuration is correct
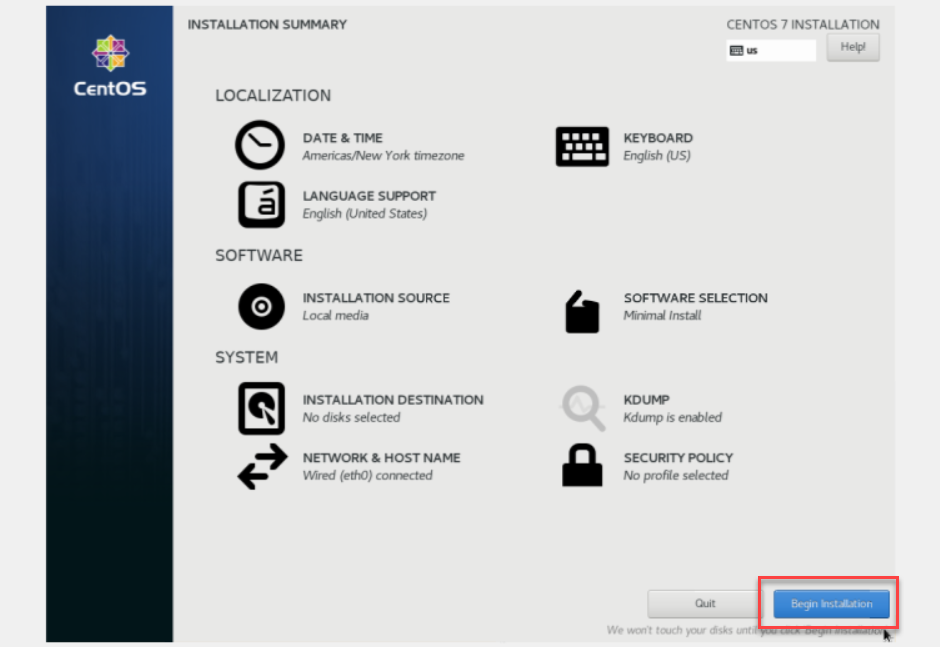
Begin Installation
Change the DATE & TIME settings to reflect your region and then click on Begin Installation
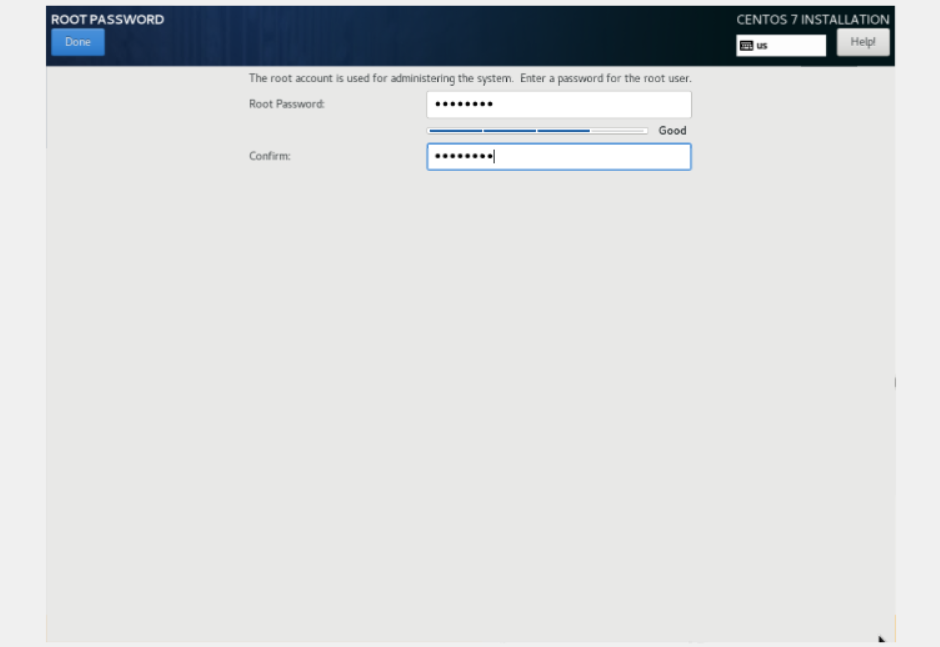
Set ROOT PASSWORD
Click on the ROOT PASSWORD selector and change your root password
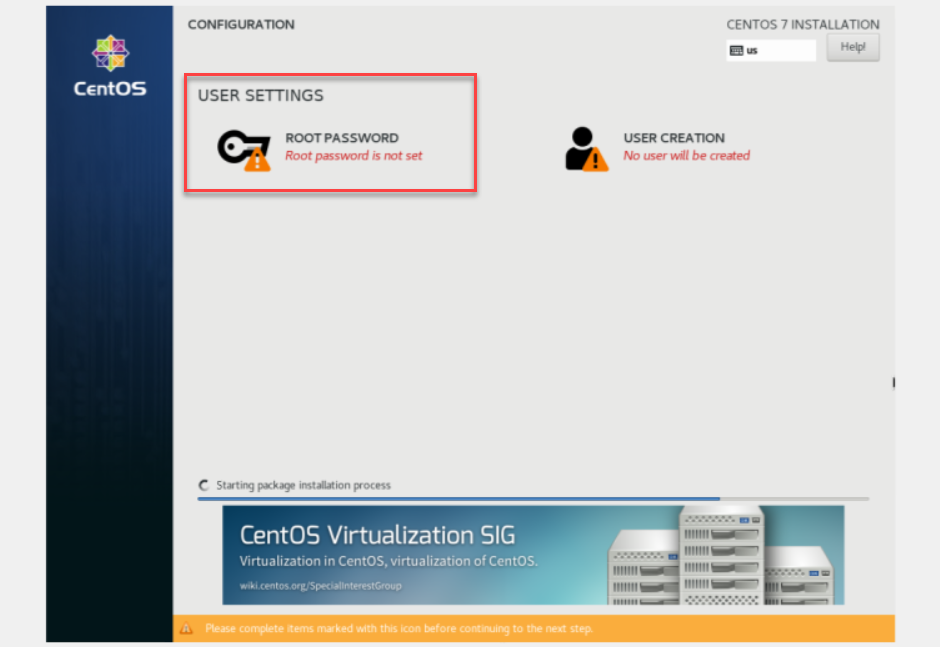
Make sure the root password is very difficult to guess by brute force attack using alpha numeric and special characters Click on Done once configured
IP Address
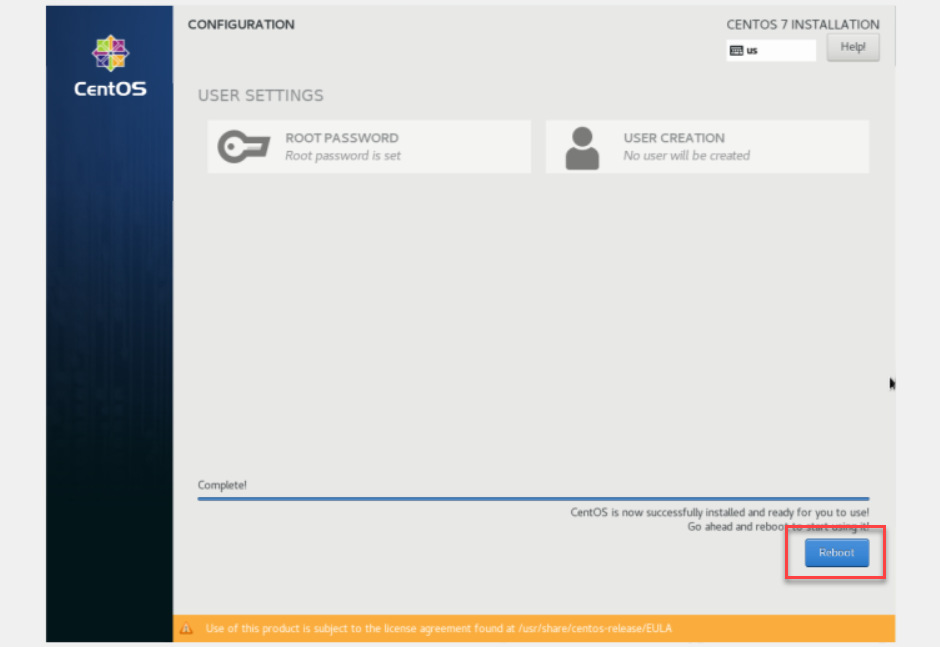
Remove your installation medium and click on Reboot The server will reboot and the console will become visible for root to login

Post OS Installation
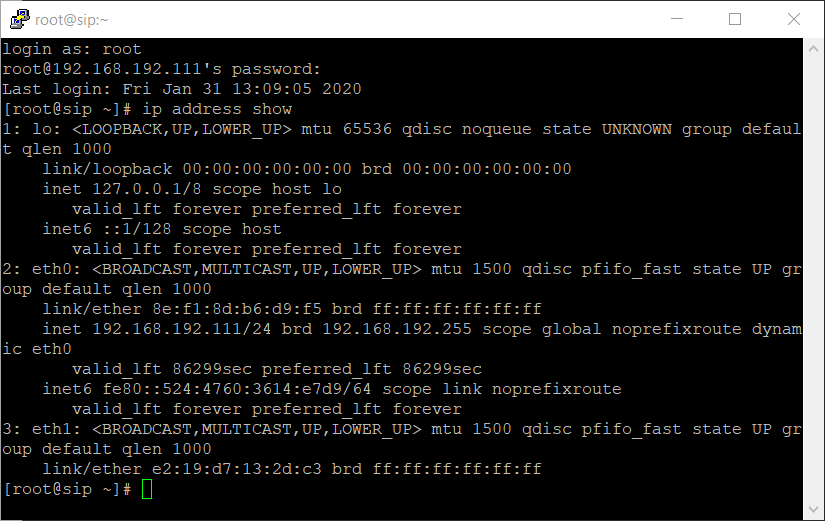
You can use the command ‘ip address show’ to see your IP address You will have to run commands to install your ScopTEL software
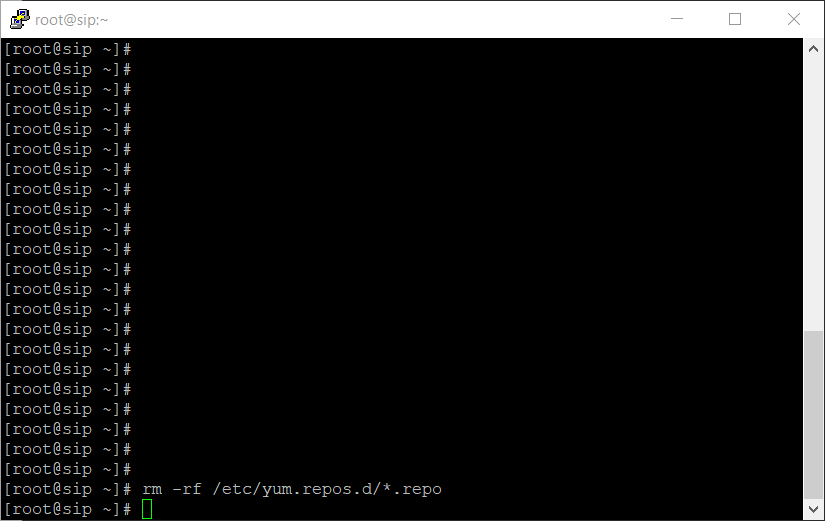
Cleaning the Repositories
Run this command to clear the default CentOS 7 repositories:
rm -rf /etc/yum.repos.d/*.repo
Adding the Repositories
Run this command to add the ScopServ repositories:
printf "[scopserv]\nname=ScopServ Packages\nbaseurl=http://download.scopserv.com/dist/redhat/el7/en/x86_64/scopserv/" > /etc/yum.repos.d/scopserv.repo

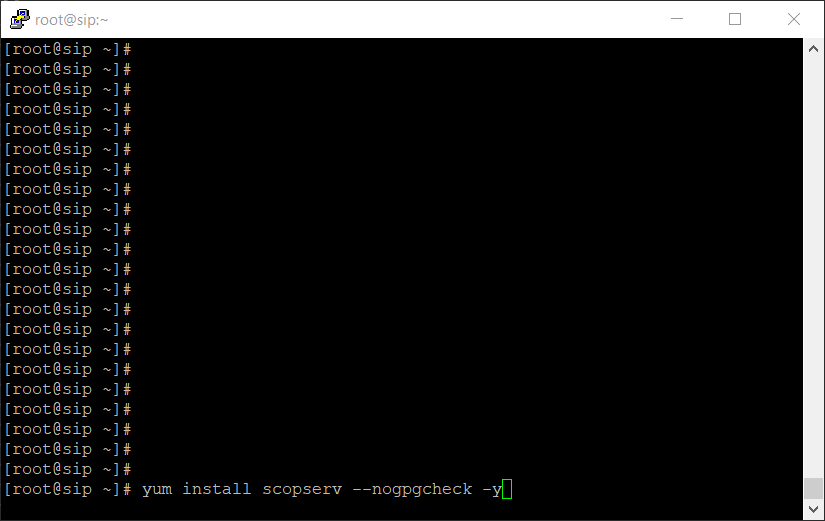
Install the Software
Run this command to install the ScopTEL Software:
yum install scopserv --nogpgcheck -y
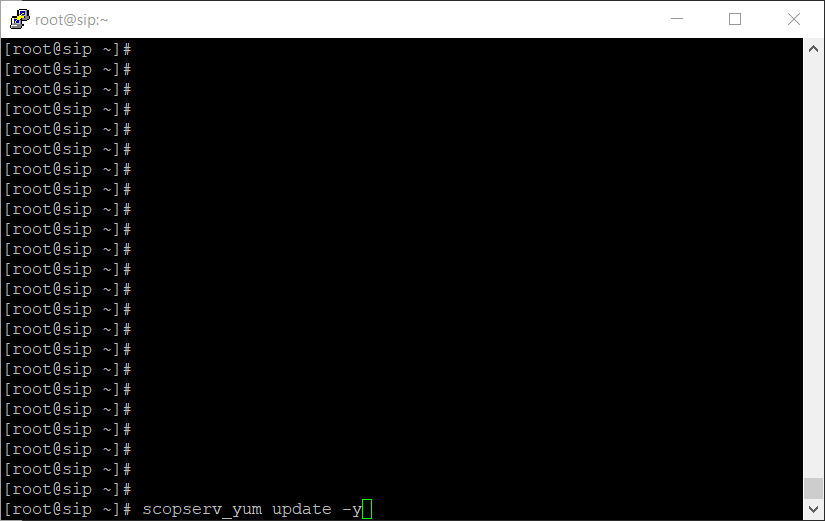
Update the Software
Run this command to update the OS and the ScopTEL software and to compile dahdi and wanpipe drivers automatically:
scopserv_yum update -y
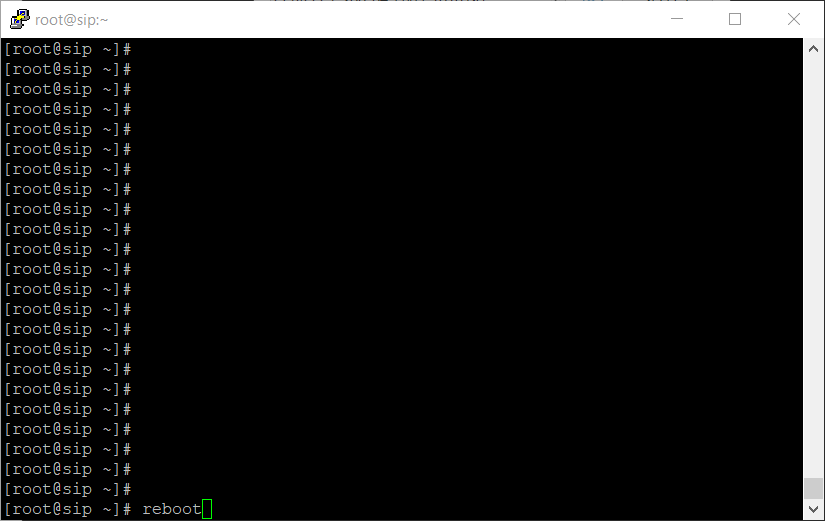
Reboot the Server
Run this command to reboot the server and compile all the drivers automatically:
reboot
After the reboot you can login with a web browser to your server and start configuring ScopTEL for your installation http://<ip address/hostname>:5555