SCOPCOMM User Guide
Last updated for version 1.12, updated February 17, 2021
SCOPCOMM is SCOPTEL’s softphone solution. It comes in three flavours:
Softphone
The SCOPCOMM softphone is an application that can be downloaded from the Apple Store and Google Play. You may download it from the store for you smartphone brand directly, or use the link that your system administrator will send you; however, it will not let you use the service until you are provisioned in the system. If you have not received provisioning information, please contact your manager.
You may receive an automated e-mail with provisioning information, or you may receive this information from your system administrator. This information comes in the form of a QR code that can be scanned with the application. Once provisioned, all SCOPCOMM softphone functions can be used.
SCOPCOMM Softphone displays five buttons on the bar at the bottom.

Recents
This screen displays recent calls, allows one-click dial-back, and search.
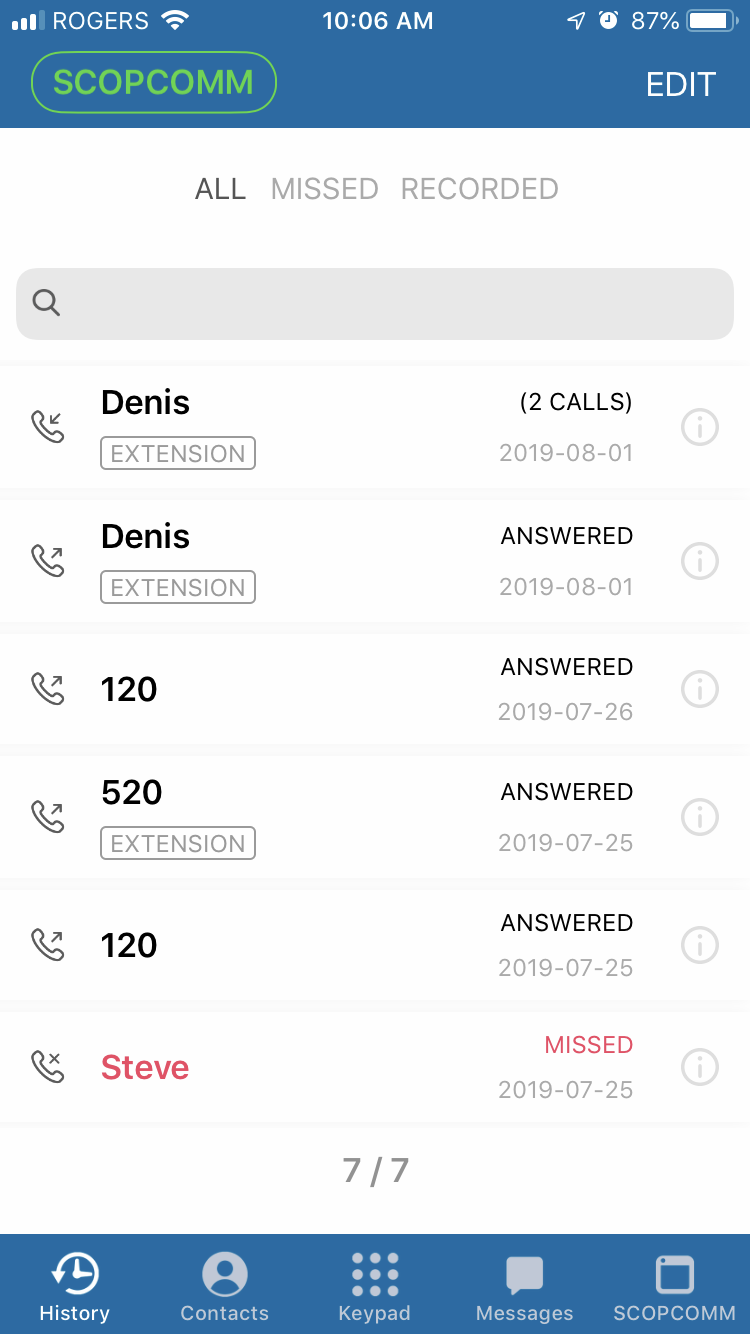
To delete entries:
Click the ‘Edit’ link on the upper right.
Select the messages you want to dispose of.
Click ‘Delete’ on the bottom.
You can filter entries by selecting one of the following headings:
ALL: no filtering
MISSED: missed calls that did not leave messages
RECORDED: missed calls that left a message
Contacts
This screen lists your phone contacts, and supports importing contacts from your own device. Each contact entry also allows the following functions:
calling
starting video call
sending a message
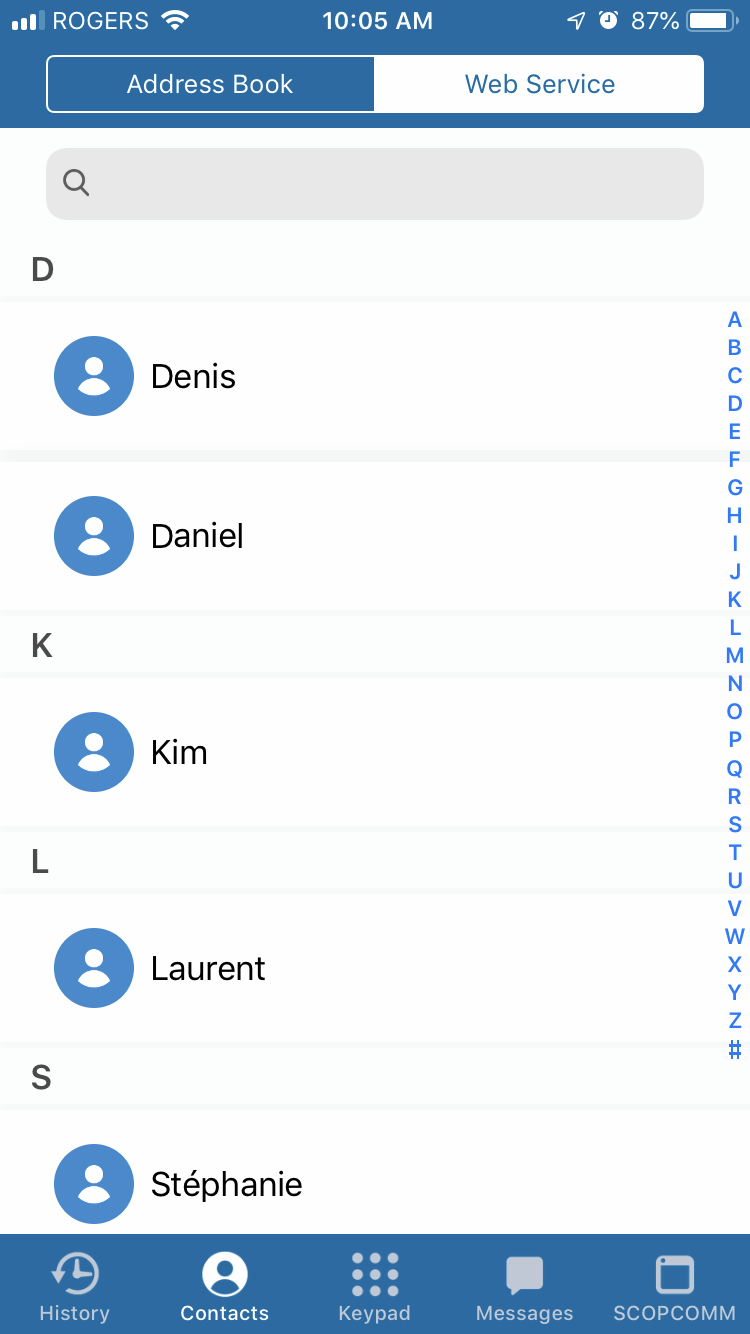
Address Book
When logging in the first time, you will be offered to import your own contacts. These will appear here.
Web Service
The other users on your system are listed here. When you select one to see details, you will see two entries:
Extension: use this one to make calls.
Message: use this one to send a text message.
Keypad
The keypad is where you dial numbers you wish to call. It is also where you can access application settings.
If you have phone messages waiting for, you will see a blue “message” button. To access your messages, click on the “message” button and follow the instructions. This button does not appear if you have no messages.
The green “dial” is for calling out. To call a number, dial the number on the keypad and click the “dial” button.
Conference Calls
To set up a conference call:
Make a phone call to the first number.
When the connection is made, press “Add Caller”.
Dial the second number.
When the connection is made, press “Conference”.
You may add additional participants by repeating steps 2 to 4.
Messages
This screen list your chat history. Messages are grouped by contact. You can both send and receive messages and media.
In addition, the following functions can be used:
Editing/deleting
Dialing
Contact information
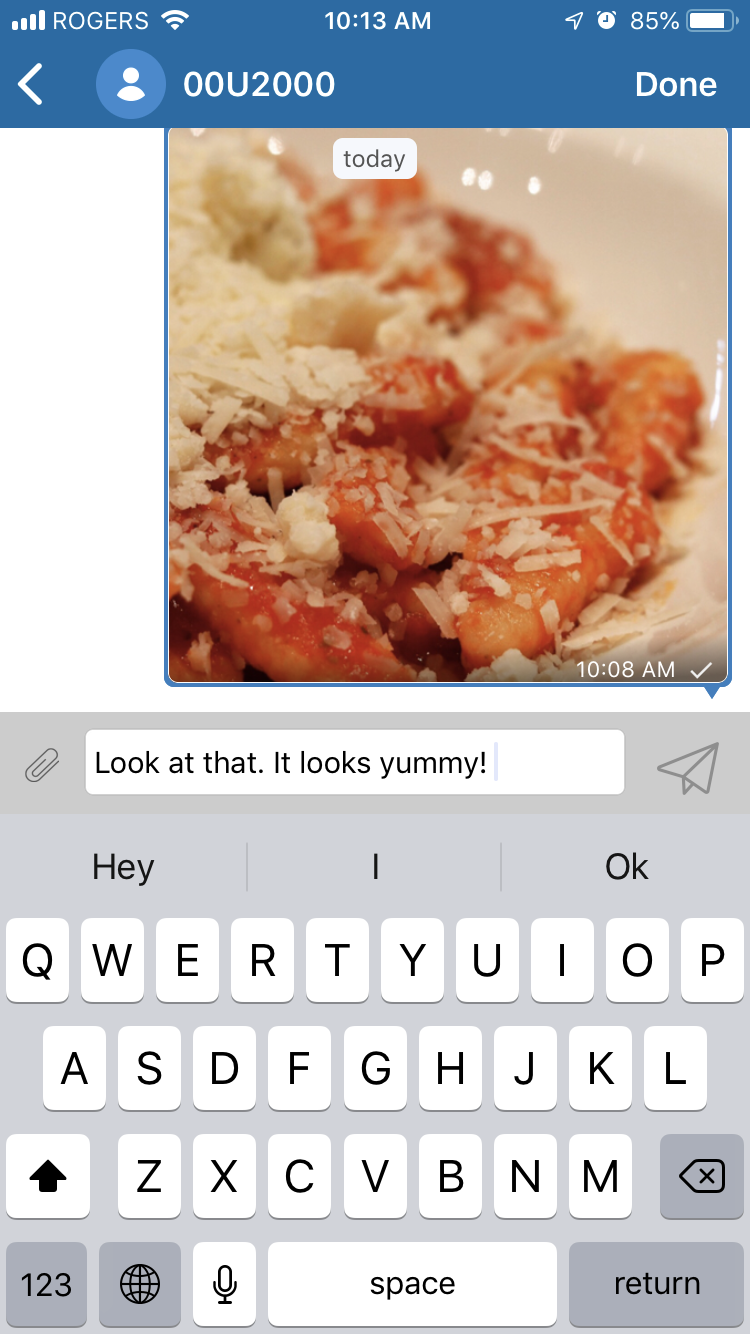
Chat messages can only be sent to other SCOPCOMM users on your system.
Settings
To access application settings:
Select the Keypad screen.
Tap ‘…’ on the upper right.
Do not modify settings that are not explained here.
Preferences: |
sundry settings such as ring, do not disturb rules, language, etc. |
About: |
company information |
Usage: |
your usage statistics |
Troubleshooting
If you are having problems authenticating or starting the application it may be necessary to reprovison it:
Select the Keypad tab.
Select ‘…’ to open settings.
Select ‘Reset Application’ and confirm.
Scan your provisioning QR code.
If you are still experiencing problems, please contact your system administrator.
Do Not Disturb
To activate ‘Do Not Disturb’ mode, click on SCOPCOMM button on the uppper left, and flip the switch.
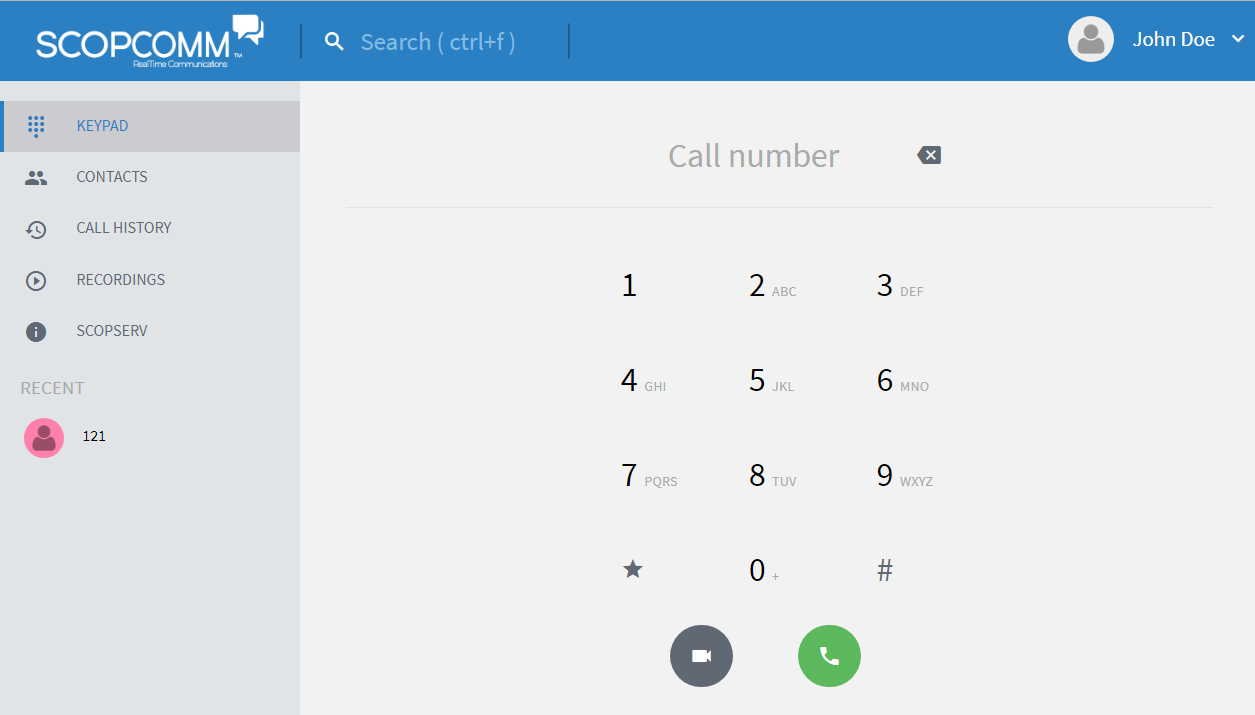
Desktop
SCOPCOMM Desktop is a softphone for Windows and MacOS. You can download the application from the SCOPSERV website (https://download.scopserv.com/softwares/). To log in, use the credentials provided to you by your administrator, or by automated e-mail. If you have not received provisioning information, please contact your manager.
SCOPCOMM Desktop displays five buttons on the sidebar:
Dialpad
Contacts
Recents
Do Not Disturb
Settings
The first one displays or hides the dialpad. The several contact lists (Contacts) and recent call history (Recents) are displayed below the dialpad. The Do Not Disturb button will stop the softphone incoming calls from ringing. Settings allows you to configure softphone options.

Dialpad
The dialpad is where you dial numbers you wish to call. The green “dial” is for calling out. To call a number, dial the number on the keypad and click the “dial” button.
Contacts
This panel lists your phone contacts, and supports importing contacts from your own device.
Quick Dial, contacts added directly
Address Book, contacts imported from your current device
Web Service, contacts imported from your telephony server

To add a contact:
Go to Quick Dial.
Click to “Add Contact” icon.
Enter and save the contact information.
To delete or edit a contact, right-click it.
When you select a contact, the application will display the contact information. Depending on the type of info, you can:
call a phone number
open the chat window
start an e-mail
Recents
This screen displays recent calls and chats.
Select one of the entries, and you will see your history with the associated contact. When viewing call and chat history, you will have the following options in the viewing panel:
Audio Call, to call back the number
Add Participant, to include one more person to the chat
History, to filter different types of calls or to just see chat messages
Delete, to clear the entire history
Toggle Sidebar, to expand the pane for better viewing
Do Not Disturb
Click on this icon to turn on/off Do Not Disturb mode. When this mode is on, incoming calls will not be accepted and will not ring your softphone.
Settings
Settings are accessed by clicking the gear icon.
About : general information, including version number
Account : user account information
Notifications : ringtone and texttone
Sound : audio settings
Recording : call recording settings
Controls : application launching settings
Logs : activity logs, used for debugging
Reset : delete provisioning information, resets the application to a fresh install
Troubleshooting
If you are having problems using the application it may be necessary to reprovison it:
Go to Settings.
Click “Reset” and “Yes”.
You can reprovision your app using the credentials provided by your administrator. If you are still experiencing problems, please contact your system administrator.
WebRTC
SCOPCOMM WebRTC is a client for personal computers that provides the same basic features as the phone. There is web client and an application that can be installed on MacOS or Windows. Both require online access.
You may receive an automated e-mail with provisioning information, or you may receive this information from your system administrator. This information comes in the form of a weblink, username, and password.
You can use Chrome to access the weblink (https://rtc.scopserv.com), or you can download the application from the SCOPSERV website (http://download.scopserv.com/softwares/). In either case, you can authenticate with your credentials to access all SCOPCOMM softphone functions.
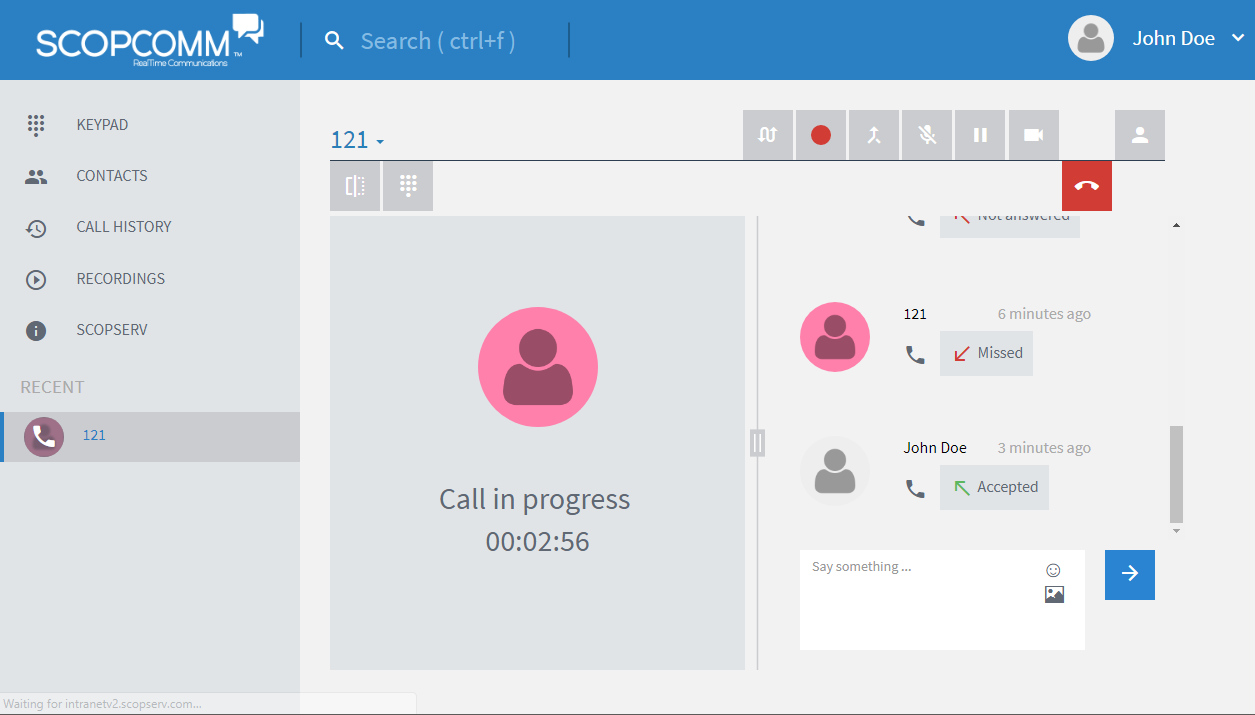
The screen is divide in three parts: the header, the sidebar, and the main pane.
Sidebar
The sidebar gives quick access to the following:
Keypad
Contacts
Call History
Recordings
Guide
What you select in the sidebar updates the display in the main pane.
Keypad
From this screen you can dial a number as you would on a phone. The number can be typed in the text box or dialed by clicking the keypad.
One dialed you can select one of the following call method:
audio
audio + video
Contacts
This will display your existing contacts. Numbers you dial and pick up are added under All tab for quick access.
Call History
This will display a listing of you call history, such as incoming and outgoing calls. For each call, you have the caller id and duration. You can also call the number back directly, and listen to the call if you turned on recording.
Recordings
This will display a listing of recorded calls. From here you can listen to them, export, and delete them. Recording info is also displayed:
time
duration
file size
You should take into consideration that all recordings are local to your computer (or browser), and are subject to being purged if memory runs out.
Main Pane
The main pane is where viewing detailed info and your call interactions occur. The different types of info displayed are described above.
When a call is ongoing, the main pane has the following buttons:
Chat + Call layout: to toggle between different layouts.
DTMF Keypad: to access the keypad
Transfer: redirect a call to another number
Record call: turn on/off recording. Recordings can be accessed under Recording in the sidebar.
Attended transfer: redirect a call to another number, but leaves you on the call until you are ready to leave it
Mute: turn sound on/off on your end
Hold: put the call on hold
Switch video on/off: turn video on/off. There may be some limitations as to whether this function works depending on the compatibility of the devices.
Hangup: put an end to ongoing call
Contact details: if the number is associated to an existing contact, you can access contact details.
Chat messages can only be sent to other SCOPCOMM users on your system.